
Homemade Bread Recipe: Why You’ll Never Buy Bread Again
There are very few experiences in the kitchen that match the quiet satisfaction of pulling a golden, fragrant loaf of bread out of the oven. The crust crackles softly as it cools. The inside is pillowy, warm, and tender. The entire house smells like something wonderful is happening — because it is. Baking bread from scratch is one of those fundamental cooking skills that, once you try it, changes the way you think about what belongs in your kitchen.Baked Goods
This recipe uses just five straightforward ingredients. No bread machine, no stand mixer required, and no experience necessary. Just a bowl, your hands, a little patience, and the kind of result that makes store-bought bread feel like a compromise. Once you taste a slice still warm from the oven, you’ll understand why homemade bread has a way of becoming a permanent habit.
Ingredients
4¾ cups (570g) plain flour, plus extra for kneading
1 tablespoon (10g) dry active yeast
1 teaspoon salt
1⅓ cups (320ml) warm water
4 tablespoons (60ml) olive oil
That’s the entire list. Five pantry staples, nothing more. The simplicity is part of what makes this recipe so enduring and so easy to repeat.Cooking & Recipes
Step-by-Step Instructions
Step 1 — Activate the Yeast
Begin by waking up the yeast. Pour the warm water into a small bowl — it should feel comfortably warm against your wrist, similar to bathwater. Too cold and the yeast won’t activate; too hot and you’ll kill it. Add the dry yeast and stir gently, then let the mixture rest for about 5 minutes undisturbed. Within that time you should see bubbles forming and a slight frothy layer developing on the surface. That foam is a sign the yeast is alive and ready. If nothing happens after 5 minutes, your water was likely too hot or the yeast has expired — start fresh before proceeding.
Step 2 — Mix the Dough
In a large bowl, combine the flour and salt and stir briefly to distribute the salt evenly. Create a well in the center and pour in the olive oil followed by the activated yeast mixture. Using a wooden spoon or your hands, bring the ingredients together until a rough, shaggy dough begins to form. If the dough feels excessively sticky and is clinging to everything, add a small amount of flour — a tablespoon at a time — until it comes together into a workable mass. Avoid the temptation to add too much flour too quickly; a slightly tacky dough is far better than a dry one.
Step 3 — Knead the Dough
Turn the dough out onto a clean, lightly floured surface and begin kneading. Push the dough away from you with the heel of your hand, fold it back toward you, rotate it a quarter turn, and repeat. Keep this rhythm going for 8 to 10 minutes. What you’re doing during this process is developing the gluten network — the elastic structure that gives bread its texture and allows it to trap the air bubbles produced by the yeast. As you knead, the dough will gradually transform from rough and uneven to smooth, supple, and elastic. It should feel like soft leather when it’s ready, springing back gently when you poke it with a finger.
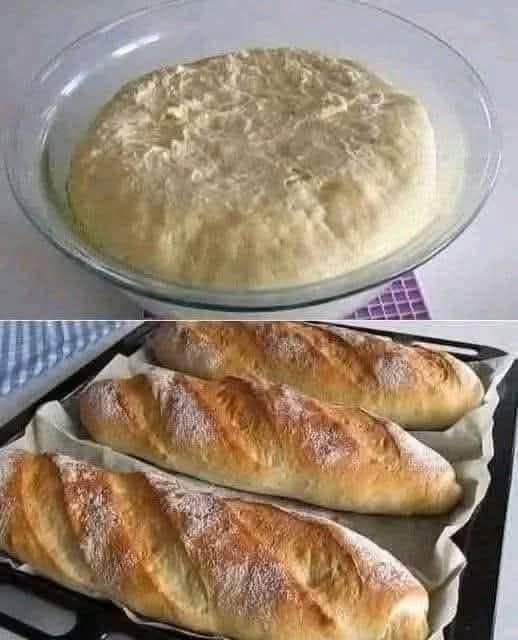
Step 4 — First Rise
Shape the kneaded dough into a ball and place it into a clean bowl that’s been lightly coated with a small amount of olive oil. Turn the dough once to coat the surface and prevent it from drying out. Cover the bowl loosely with a clean kitchen towel or a piece of plastic wrap and set it in a warm, draft-free spot. Let the dough rise for about 1 hour, or until it has roughly doubled in size. A turned-off oven with just the light on, or a warm spot near your stovetop, works well. This first rise — called the bulk fermentation — is where the yeast produces the carbon dioxide gas that will make your bread light and airy.
Step 5 — Shape the Dough
Once the dough has doubled, gently press your fist into the center to release the built-up gas. This is called “punching down” the dough, and it’s a satisfying step. Turn the dough out onto a lightly floured surface and shape it into your desired form — either a classic oval freeform loaf or a more uniform shape if you’re using a loaf pan. Handle the dough gently at this stage; you want to degas it just enough to shape it without working all the structure out of it.
Step 6 — Second Rise
Place the shaped loaf onto a greased baking sheet or into a greased 9×5-inch loaf pan. Cover it loosely with a towel and allow it to rise for another 30 to 45 minutes. This second, shorter rise — called proofing — gives the dough one final opportunity to puff up and develop an even lighter interior texture. Don’t skip it. The difference between a properly proofed loaf and one that goes straight into the oven is noticeable in both height and crumb.
Step 7 — Bake
While the dough completes its second rise, preheat your oven to 375°F (190°C). Once the loaf has finished proofing, brush the top gently with a light coating of olive oil using a pastry brush or your fingertips — this encourages a beautiful golden color and adds a hint of richness to the crust. Slide the loaf into the center of the oven and bake for 25 to 30 minutes. The bread is done when the top is deep golden brown and the loaf sounds hollow when you tap the bottom firmly with your knuckle. That hollow sound tells you the interior is fully baked through.
Step 8 — Cool Before Slicing
Transfer the bread to a wire rack and resist the urge to cut into it immediately. Let it cool for at least 15 minutes before slicing. This resting period is more important than it sounds — the interior of the bread is still finishing its set as steam redistributes inside the loaf. Cutting into it too soon releases that steam all at once and can result in a gummy, slightly doughy interior. After 15 minutes, the crumb will be fully set and the texture exactly as it should be. Slice and serve warm with good butter.
NEXT PAGE
ADVERTISEMENT
