
Page 3: The Chocolate Dip
Step 5: Melt the Coating Combine the chocolate chips and coconut oil in a microwave-safe bowl. Microwave in 30-second intervals, stirring well between each session, until the chocolate is silky and fully melted.
Step 6: The Dipping Process Remove the chilled peanut butter eggs from the fridge. Using a fork (or a specialized dipping tool), submerge one egg at a time into the chocolate. Lift it out and tap the fork gently against the side of the bowl to let the excess chocolate drip off.
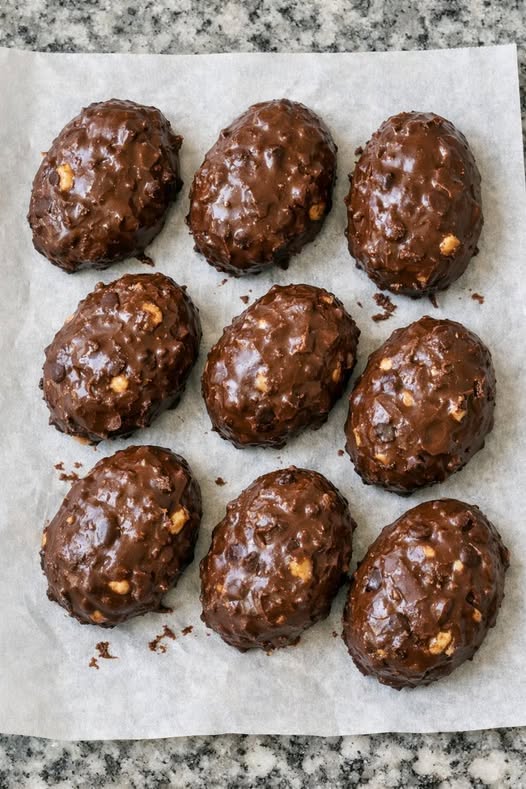
Step 7: The “Nana” Texture Slide the coated egg back onto the parchment paper. While the chocolate is still wet, you can use the back of a spoon to create those signature swirls and ridges seen in the photo, or sprinkle on some crushed peanuts for extra crunch.
Page 4: Setting and Storage Tips
Step 8: Final Set Once all the eggs are dipped, return the tray to the refrigerator for at least 30 minutes to allow the chocolate shell to harden completely.
Storage Instructions Because of the butter content in the filling, these eggs are best served cold. Store them in an airtight container with layers separated by parchment paper.
Discover more
Cake
CHOCOLATE
Chocolate
Pro-Tips for Success:
Keep them Cold: Only take a few eggs out of the fridge at a time to dip. If they sit on the counter too long, they become soft and difficult to handle.
The “Double Dip”: If you like a thicker shell, let the first coat set in the fridge for 10 minutes, then dip them a second time.
Freezer Friendly: These stay fresh in the freezer for up to 3 months. Just hide them behind the frozen peas so no one finds them!
ADVERTISEMENT
