
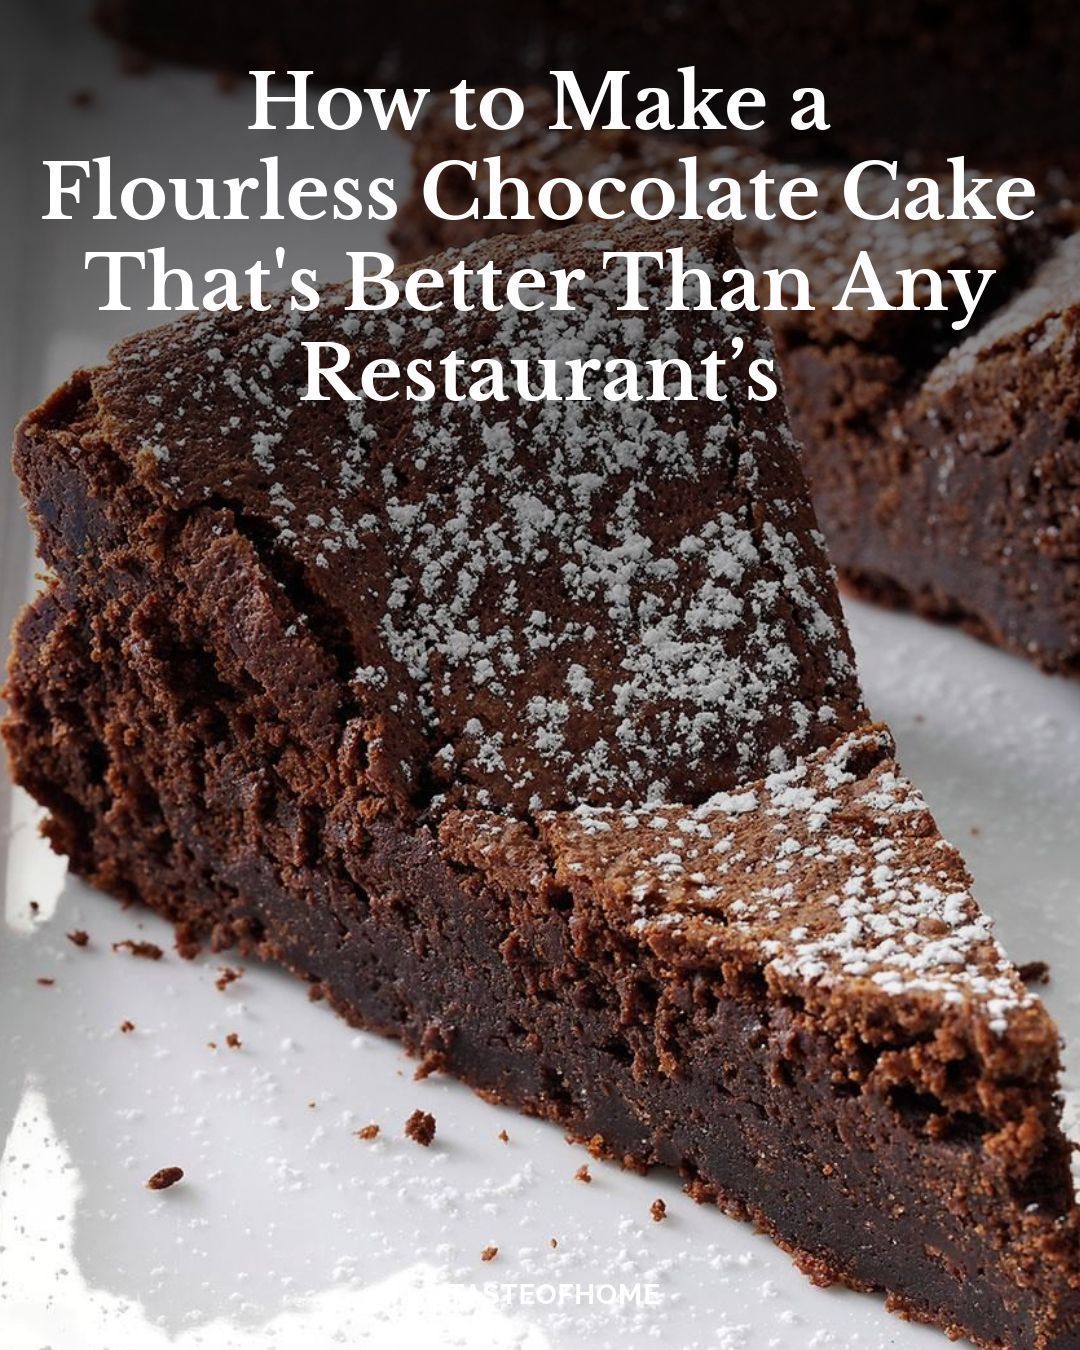
Learn how to make flourless chocolate cake at home. This cake is special occasion-ready but takes just five ingredients—really!
Flourless chocolate cake is one of those special occasion desserts. You see it on the dessert menu at your favorite steakhouse or served up at elegant parties. While this cake may seem poised for these celebratory occasions, it’s actually not too complicated to make right at home.
With just five ingredients, you can make this dessert yourself. It’s a great finish to any meal. Friends and family will be impressed (especially if you top it off with some ice cream). Plus, if you’ve got gluten-free guests, you don’t need to sweat—this treat is naturally gluten-free.
With some tips from our Test Kitchen, we’ll show you how to make this decadent cake yourself.
Our Favorite Flourless Chocolate Cake Recipe
Our Test Kitchen’s go-to flourless chocolate cake recipe comes to us from reader Kayla Albrecht of Illinois. She says that this recipe is for serious chocoholics, and we agree.
Here’s what you’ll need:
5 eggs, cold
12 ounces semisweet chocolate, chopped
3/4 cup unsalted butter, cubed
1/4 teaspoon cream of tartar
1/2 cup sugar
Confectioners’ sugar, for dusting
9-Inch Springform Pan
Available for $17.99
Hand Mixer
Shop Now
Ghirardelli Semi Sweet Baking Bar – 4oz
Semisweet Chocolate
Shop Now
Step 1: Prep the Eggs
Start by separating the eggs. Use an egg separator, a spoon or just the shells. Just be very careful not to get a single drop of yolk in the whites.
Once all your eggs are separated, let them sit at room temperature for 30 minutes. Now, you might be wondering, why not just let the eggs come to room temp and then separate? Well, it’s easiest to separate the yolks from the whites when the eggs are cold, but the whites will whip up to their greatest volume at room temperature.
Step 2: Get the Oven and Pan Ready
Next, get your pan and oven ready. Since this cake batter relies on egg whites for all its lift, it’s important to have these ready so you can get it into the oven as quickly as possible.
Preheat the oven to 350ºF and grease a nine-inch springform pan—yep, even if it’s nonstick. It’s best to take every precaution with a delicate cake like this.
Step 3: Melt the Chocolate
Next, start to melt the chocolate. Our Test Kitchen recommends placing a heat-safe bowl over a pan of simmering water and stirring the chocolate and butter gently until smooth and glossy. When completely melted, remove from the heat and let the mixture cool slightly.
Editor’s tip: Be mindful not to let any water or steam come into contact with the chocolate. This will cause the chocolate to seize and then there’s no saving it.
A few words here on your chocolate. When it comes to chocolate, use your favorite brand of semisweet chocolate in this recipe. With so few ingredients, quality really does stand out, so don’t scrimp!
Step 4: Beat the Egg Yolks and Chocolate
Next, grab your hand mixer (a stand mixer fitted with the whisk attachment works, too) and beat the egg yolks until thick and lemon-colored. When you pull your beaters out of the bowl, the yolks should be ribbon-like (this is known as ribbon stage).
Gradually add in the cooled chocolate mixture and beat to combine.
Step 5: Beat the Egg Whites Until Stiff Peaks Form
This is the magic step. Whipped egg whites are what gives this recipe its body, that oomph that makes the cake light and airy (and not just a giant block of chocolate).
In a separate clean, large bowl, combine the egg whites with the cream of tartar and start beating on medium speed until they are foamy.
Gradually add the sugar a tablespoon at a time. Continue beating on high after each addition until the sugar is fully dissolved. This gradual addition allows the sugar to incorporate into the whites without becoming gritty.
Editor’s tip: Cream of tartar is an acid that stabilizes the egg whites, helping them stay fluffy and tall without deflating. You don’t strictly need it, but it’ll help you out.
Keep beating the egg whites until they reach the stiff peak stage. You’ll know they’re ready when you lift the beaters out of the bowl and the whites stand straight up—no drooping or dripping into the bowl. To be absolutely sure, tilt the bowl—stiff egg whites won’t budge. One final test: Dip your finger into the mix to make sure the mix is satiny and smooth, not gritty—all the sugar should have dissolved.
NEXT PAGE
ADVERTISEMENT
