
A layered strawberry Bundt cake is a stunning dessert centerpiece for spring or summer. The center layer of buttercream and strawberry jam is divine.
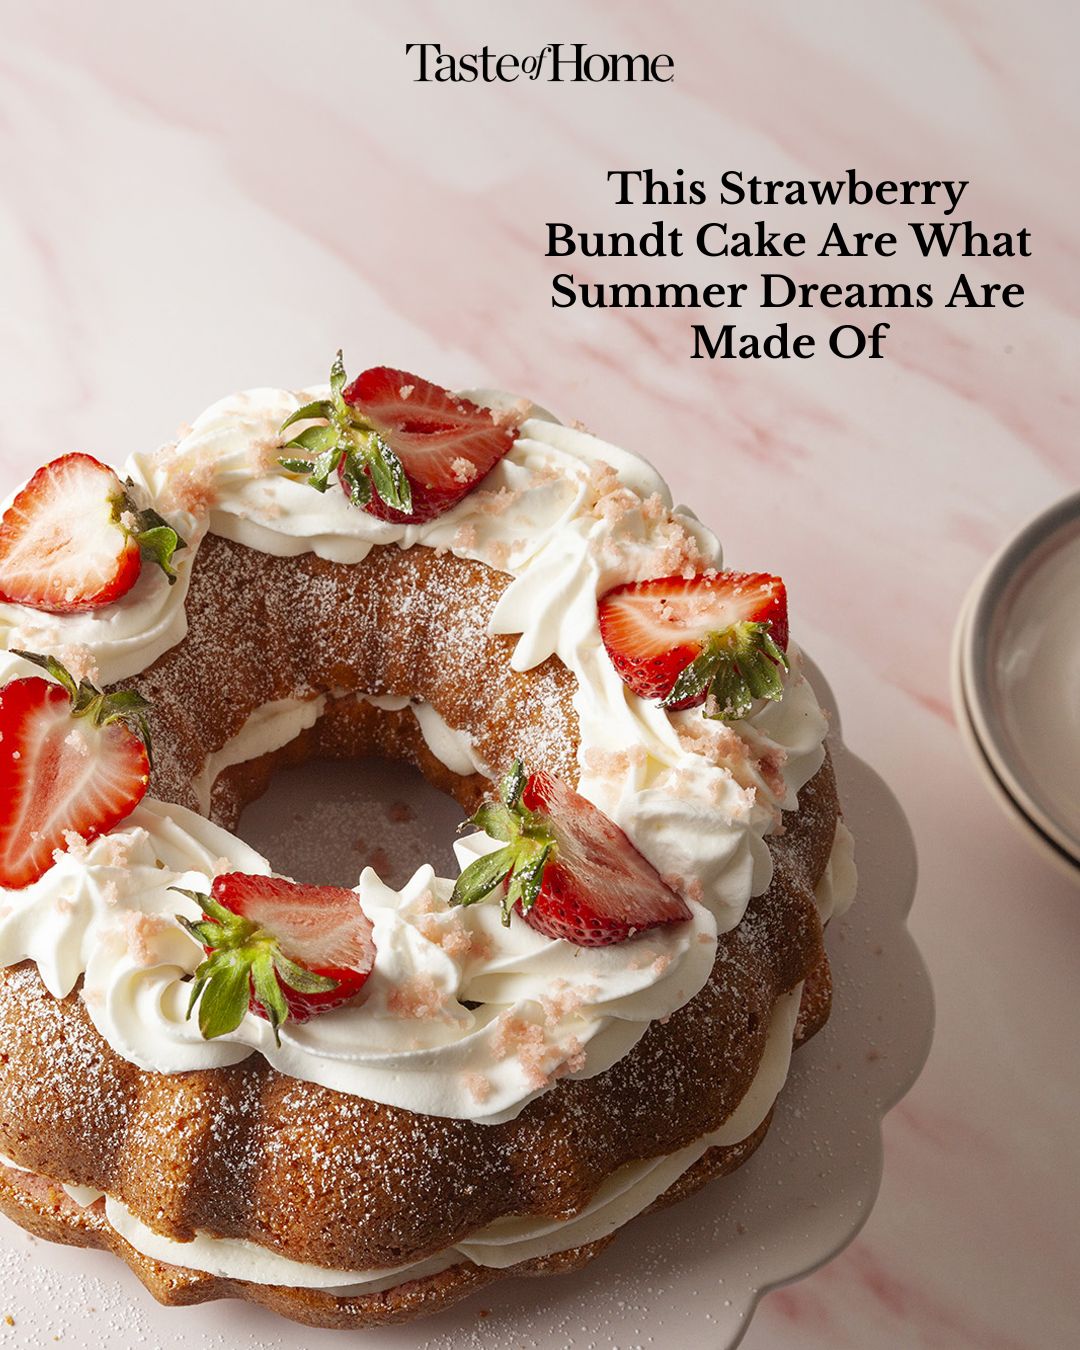
A traditional strawberry Bundt cake is a stunning springtime or summer dessert, whether you love the cake for its bright color or the fresh berry garnish on top. But if you want to take it up a notch, a layered strawberry Bundt cake would absolutely blow your guests away. The layers are made by slicing the baked Bundt in half—horizontally, not vertically—and then adding a middle layer of vanilla buttercream and strawberry jam. When assembled, you can see the pretty layers of pink and white.
I chose a classic Bundt pan shape for this cake, but other Bundt pans will work just as well. This pretty cake is one of our most decadent fresh strawberry recipes that’s perfect for baby and bridal showers or summertime birthday and holiday celebrations.
Layered Strawberry Bundt Cake Ingredients
All-purpose flour: Whether you use measuring cups or a scale, measure your flour precisely for the best results.
Eggs: Baking with room-temperature eggs makes them easier to incorporate into the cake batter.
Butter: Set it on the counter an hour in advance, or soften butter quickly from the fridge by slicing or grating the stick of butter.
Strawberry puree: Make a strawberry puree by blending about 5 ounces of strawberries in a blender or food processor. Use fresh hulled berries or thawed frozen berries.
Sugar: Granulated sugar sweetens the cake and, when blended with the butter, aerates the batter.
Milk: Whole milk is the liquid that brings the cake batter together.
Strawberry Jell-O powder: For the right amount of color and strawberry flavor, use just a few tablespoons of powder from a box of strawberry gelatin mix. Use the rest in another recipe with Jell-O.
Vanilla extract: There’s a vanilla for every budget: Try one of the vanilla extract brands recommended by our Test Kitchen if you don’t already have some vanilla on hand.
Confectioners’ sugar: This quick-dissolving sugar makes a smooth buttercream frosting filling. Confectioners’ sugar is also used to dust the top of the cake.
Heavy whipping cream: The layered strawberry Bundt cake is topped with fresh whipped cream. Using cold beaters yields the best results.
Strawberry jam: Nestled against the vanilla buttercream in the filling is a layer of store-bought or homemade strawberry jam.
Fresh strawberries: Berries are the pretty garnish on the finished cake. Store fresh strawberries correctly so they’ll stay firm, fresh and beautiful until the cake is ready for garnishing.
Cream of tartar: Add just a little cream of tartar to the whipped cream to help stabilize it for longer.
Baking powder: This leavening agent helps give the cake a light texture.
Salt: A pinch of salt in the batter makes the flavors in this cake more vibrant.
Directions
Step 1: Make the batter
Preheat the oven to 350°F. Grease and flour a 10-cup Bundt pan, being careful to get into all the grooves and corners and around the center column.
Whisk together the flour, baking powder and salt in a large bowl; set aside. In the bowl of a stand mixer fitted with the paddle attachment, cream the butter and sugar at medium-high speed for four to five minutes, scraping the bowl once or twice, until the mixture is fluffy and light in color. Add the eggs, one at a time, mixing well after each addition.
Then, blend in the milk, strawberry puree, strawberry Jell-O powder and vanilla extract. Add the flour mixture in two halves, mixing on low speed until the batter just combined.
Editor’s Tip: Avoid overmixing the cake batter by scraping the bowl once or twice to get all the flour off the sides.
Step 2: Bake the cake
Pour the batter into the prepared Bundt pan, smoothing it into an even layer. Bake the cake for 40 to 45 minutes. It’s finished when the temperature at the thickest part reads between 205° and 210° on a digital thermometer or when a skewer or knife comes out of the cake clean (or with only a few crumbs).
Step 3: Cool the cake
Remove the cake from the oven and let it cool for 10 minutes. Run a knife or thin plastic spatula around the edges of the cake and around the center column to loosen the cake from the pan. Then, place a wire rack over the top of the pan and flip the pan over to release the cake onto the rack. Let the cake cool completely.
Step 4: Make the buttercream
Beat the softened butter in a large bowl for three to four minutes until it’s creamy and smooth. Add in 1 cup of confectioners’ sugar and beat it with the butter on medium-high speed. Add in the vanilla extract and a splash of milk; beat the mixture until it’s creamy. Continue alternating between cups of confectioners’ sugar and milk, beating the frosting well after each addition. When all the buttercream ingredients are in, beat the buttercream for one to two minutes more until it’s light in color and creamy. Set the frosting aside.
Step 5: Make the whipped cream
Chill a mixer bowl and beaters for 10 minutes. Then, pour the cold heavy whipping cream into the bowl; beat the cream on medium-high for two to three minutes. Add in the confectioners’ sugar, vanilla and cream of tartar. Whip the cream for another three to four minutes until it has stiff peaks. Refrigerate.
Step 6: Assemble the cake
Use a serrated knife to slice the cooled Bundt cake in half horizontally. Use a spoon to scoop out a 1/2-inch deep channel from the middle of the bottom ring. (Keep the crumbled cake scraps.) Place the cake bottom on a serving platter.
Spoon or pipe the buttercream frosting into the channel to fill it, and spread it smooth. Spoon or pipe the remaining frosting over the cake layer, smoothing it to the edges to be visible once the cake is assembled. Then, spread strawberry jam over the cut side of the other cake half. Place the top half, jam-side-down, onto the buttercream-frosted layer.
Step 7: Garnish and serve
Dust the entire top of the cake with confectioners’ sugar. Then, spread or pipe the whipped cream in a layer on top of the layered Bundt cake. Garnish with the fresh strawberries, and take the remaining cake crumbs and sprinkle them over the top for another touch of pink.
Layered Strawberry Bundt Cake Variations
Add fresh berries to the filling: Slice fresh, hulled strawberries and layer them in the middle of the cake with the buttercream and jam.
Try strawberry frosting: Instead of vanilla buttercream, add extra fruit flavor to the cake with a strawberry cream cheese frosting.
Use a different jam: Complement the strawberry cake with other jams like apricot, blackberry or sweet-tart strawberry rhubarb jam.
How to Store Layered Strawberry Bundt Cake
To keep this layered Bundt cake fresh, cover it tightly in a cake-sized baked goods container or with food wrap. Keep the cake chilled in the refrigerator. Slices of the cake can be enjoyed cold; they’re also tasty when microwaved for about 10 seconds to warm them up just a little.
How long does strawberry Bundt cake last?
It’s important to keep the cake tightly covered so it doesn’t dry out. The chilled cake will last for up to seven days.
Can you make strawberry Bundt cake ahead of time?
Save time by making the components of your strawberry Bundt cake in advance and storing them in the fridge. Then, assemble the cake the day you want to serve it. Make the buttercream frosting up to 10 days ahead of time and store it in a tightly covered container.
The cake can be baked, tightly wrapped and held in the fridge up to a week in advance. Or, freeze the plain Bundt cake for up to two months. Let a frozen, wrapped cake thaw overnight in the fridge. The whipped cream can be made up to two days ahead of time and stored in a covered container, although you might want to whip it up again briefly before serving.
Layered Strawberry Bundt Cake Tips
What’s the key to getting cake out of a Bundt pan?
The first important step to ensure your baked Bundt cake will come out of the pan is to grease and flour it thoroughly. Grease it with vegetable shortening or a layer of nonstick cooking spray, and be sure to reach the center column and all the corners and grooves. Next, sift flour into the pan to coat the inside completely, shaking out any excess.
NEXT PAGE
ADVERTISEMENT
